VxWorks 6.8 Setup: BSP Builds, VM Deployment, and Security Testing
VxWorks is a long-standing real-time operating system (RTOS) used in embedded systems where deterministic behavior, reliability, and long operational lifetimes are critical.
Developed by Wind River, VxWorks has been deployed across aerospace, defense, industrial, automotive, networking, and scientific systems. Well-known historical deployments include aircraft systems, missile-defense platforms, and NASA Mars exploration missions.
This guide focuses on a practical VxWorks 6.8 development and lab environment, covering the architecture of the RTOS, WorkBench configuration, BSP compilation, kernel image generation, VMware-based target deployment, FTP bootstrapping, and defensive security assessment of legacy VxWorks installations.
Security note: The vulnerability-testing material below is intended for isolated lab environments and authorized defensive assessments. Do not run denial-of-service or memory-access testing against systems you do not own or explicitly have permission to test.
🧩 Understanding the VxWorks Architecture #
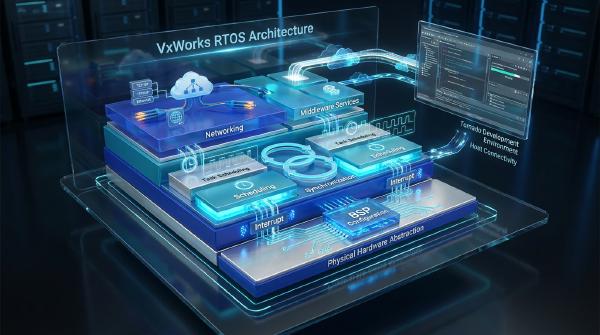
A VxWorks deployment can be viewed as several layers, with the Board Support Package (BSP) providing the bridge between the operating system and target hardware.
+--------------------------------------------------------------------------+
|                        VxWorks Application Tier                          |
+--------------------------------------------------------------------------+
|                      VxWorks Real-Time OS Kernel                         |
|  +---------------------------+  +-------------------------------------+  |
|  |  VxVMI (Virtual Memory)   |  |  VxMP (Multi-Processor Support)     |  |
|  +---------------------------+  +-------------------------------------+  |
+--------------------------------------------------------------------------+
|                     BSP (Board Support Package) Tier                     |
|    [ CPU Init | Drivers (Net/Storage) | Interrupt Control | BootROM ]    |
+--------------------------------------------------------------------------+
|                             Hardware Layer                               |
+--------------------------------------------------------------------------+
Wind River WorkBench #
Wind River WorkBench is an Eclipse-based development environment for VxWorks. It integrates source editing, project configuration, compilation, debugging, and system analysis into a single development workflow.
For VxWorks 6.8, WorkBench also provides project templates and configuration tools for building BSPs, boot loaders, and VxWorks system images.
Host-target development model #
VxWorks traditionally uses a cross-development model.
The developer works on a host machine, typically Windows in a legacy VxWorks 6.8 environment. Source code and system images are compiled on the host and then transferred to the target.
A target agent provides the communication path required for remote debugging and development operations.
Board Support Package #
The BSP is the hardware-specific layer between VxWorks and the target platform.
A BSP typically provides:
- CPU initialization
- Memory initialization
- Interrupt handling
- BootROM support
- Ethernet drivers
- Storage drivers
- Serial interfaces
- Board-specific hardware configuration
For this reason, the BSP must match the target hardware architecture.
VxVMI and VxMP #
VxWorks also provides optional extensions for more advanced system configurations.
VxVMI, the Virtual Memory Interface, provides virtual-memory capabilities and associated memory-protection mechanisms.
VxMP, the multiprocessing extension, supports communication and synchronization across multiprocessing configurations, including shared-memory mechanisms and synchronization primitives.
🖼️ Understanding VxWorks Image Types #
VxWorks 6.8 deployments can use different image layouts depending on how the boot loader and kernel are stored and loaded.
+------------------------------------------------------------------------+
|                            VxWorks Images                              |
+-----------------------------------+------------------------------------+
|       Loadable Images             |          Bootable Images           |
| (Boot ROM + VxWorks Kernel split) | (Boot ROM + Kernel merged into 1)  |
+-----------------------------------+------------------------------------+
| * bootrom (Compressed)            | * Non-ROM-resident                 |
| * bootrom_uncmp (Uncompressed)    | * ROM-resident                     |
| * bootrom_res (ROM-resident)      |                                    |
+-----------------------------------+------------------------------------+
Loadable images #
With a loadable image, the boot loader and VxWorks kernel are generated separately.
The target first starts bootROM. The boot loader initializes the target and network stack, then retrieves the VxWorks kernel image from the host.
This approach is particularly useful during development because the kernel can be rebuilt and replaced without modifying the boot loader.
Bootable images #
A bootable image combines the boot components and VxWorks kernel into a unified image.
This configuration is more appropriate for systems where the complete image is stored in non-volatile target storage and should boot without relying on a separate network-based kernel download.
🛠️ Preparing the VxWorks 6.8 Development Environment #
A representative legacy development environment consists of:
- Windows 10 host
- VxWorks 6.8.3
- Wind River WorkBench 3.2.3
- VMware Workstation
- MS-DOS 6.22
- A DOS floppy image such as
DOS622.img
Because VxWorks 6.8 is an older toolchain, using an isolated virtual machine can simplify dependency management and preserve a reproducible development environment.
🔐 Configuring the License and WorkBench #
The first stage is preparing the Wind River development environment and its license configuration.
Configure the license #
Locate the applicable Wind River license file and inspect its host identifier.
A license may contain an entry similar to:
hostid=123456789ABCDEF0If the license specifies hostid=ANY, it is not bound to a specific network-interface identifier.
For a host-bound license, configure the development environment according to the licensing requirements associated with the installed WorkBench version.
Install WorkBench #
Mount the WorkBench installation media and launch:
setup.exeDuring activation, select the appropriate permanent-license option and import the authorized .lic file.
Complete the installation using the required default or organization-specific settings.
Avoid modifying hardware identifiers solely to bypass licensing controls. Use a valid Wind River license and follow the licensing terms for the installed software.
⚙️ Configuring and Building the BSP #
The BSP configuration for the example PC target is located under:
C:\WindRiver\vxworks-6.8\target\config\pcPentium4\The BSP’s config.h file contains the default boot-line configuration.
Configure the default boot line #
A representative configuration is:
#define DEFAULT_BOOT_LINE \
"ata=0,0(0,0)host:/ata0/vxWorks h=192.168.111.134 e=192.168.111.200 u=target pw=target f=0x08"
The important parameters are:
h— Host machine IP addresse— VxWorks target IP addressu— FTP usernamepw— FTP password
For example:
Host:   192.168.111.134
Target: 192.168.111.200
User:   target
Pass:   target
Use credentials appropriate for an isolated lab rather than reusing them in production environments.
Create the BSP project #
In WorkBench:
- Select File → New → Wind River Workbench Project.
- Select Wind River VxWorks 6.8.
- Choose Boot Loader / BSP Project as the build type.
- Select the
pcPentium4BSP. - Select the
gnutool chain. - Enable Copy files to project.
- Create the project.
Open the VxWorks development shell and build the boot loader:
cd target/config/pcPentium4
make bootrom.bin
The resulting bootrom.bin can then be renamed for the DOS-based deployment:
bootrom.sysCollect the boot loader together with the required system utilities:
bootrom.sys
vxsys.com
vxload.com
The latter utilities are available under the VxWorks host binary directory:
\host\x86-win32\bin🧱 Building the VxWorks Kernel Image #
After the BSP is available, create the VxWorks image project.
Create the image project #
In WorkBench:
- Select File → New → Other → VxWorks Image Project.
- Select Based on an existing project.
- Link the image project to the previously created BSP project.
- Open Kernel Configuration.
- Add the required networking components.
For the example network-boot environment, enable services such as:
- Telnet Server
- FTP Server
- RPC
- Network applications
Rebuild the image project.
The resulting VxWorks kernel is typically generated at:
default/vxWorksThis file becomes the kernel image that the target boot loader retrieves during network boot.
💿 Deploying a VxWorks Target with VMware and MS-DOS #
A convenient way to reproduce the legacy PC target environment is to run the target inside VMware.
The overall deployment sequence is:
+--------------------------------------------------------------------------+
|                          Target VM Deployment                            |
|                                                                          |
|  1. Boot MS-DOS Floppy (DOS622.img)                                      |
|  2. Partition & Format Drive: fdisk -> format c: /s                      |
|  3. Copy System Files (bootrom.sys, vxsys.com, vxload.com) to C:\        |
|  4. Install Boot Sector: vxsys c:                                        |
|  5. Boot VxWorks Target & Fetch vxWorks Kernel via Host FTP              |
+--------------------------------------------------------------------------+
Create the target VM #
Create a VMware virtual machine configured for an MS-DOS environment.
A representative configuration is:
Guest OS:  MS-DOS
Memory:    256 MB
Disk:      2 GB IDE
Disk type: Single virtual disk file
Attach the DOS622.img floppy image and boot the VM.
Partition and format the virtual disk #
From the DOS environment:
fdiskCreate the primary DOS partition, then format the disk and transfer the DOS system files:
format c: /sShut down the VM after formatting.
Populate the target disk #
Expose or mount the VMware virtual disk through the host environment using an appropriate, supported workflow.
Assuming the target disk is accessible as Z:\, copy:
bootrom.sys
vxsys.com
vxload.com
to the root directory:
Z:\Unmount the disk before starting the VM again.
Install the VxWorks boot sector #
Boot the VM back into MS-DOS and execute:
C:
vxsys c:
After the boot configuration is installed, detach the DOS floppy image and restart the virtual machine.
The system should proceed toward the VxWorks boot loader.
🌐 Configuring FTP-Based Kernel Boot #
The loadable-image configuration requires the VxWorks boot loader to retrieve the kernel from a host machine.
On the development host, configure the FTP service with:
Host IP:        192.168.111.134
Target IP:      192.168.111.200
Username:       target
Password:       target
Home directory: Directory containing vxWorks
For the legacy VxWorks 6.8 environment, the bundled wftpd32.exe can be found under:
WindRiver\vxworks-6.8\host\x86-win32\bin\Configure the FTP server’s home directory to point to the location containing:
vxWorksWhen the target boots, bootROM uses the configured boot line to initialize networking and retrieve the VxWorks kernel from the host.
The resulting flow is:
VMware Target
      |
      v
VxWorks bootROM
      |
      | FTP
      v
Windows Host
      |
      | vxWorks image
      v
Target Memory
      |
      v
VxWorks Kernel
This split-image architecture is useful during development because the boot loader can remain relatively stable while the kernel image is rebuilt frequently.
🛡️ VxWorks Security and Legacy Vulnerabilities #
Older VxWorks installations require particular attention to network-exposed services.
Legacy versions may contain vulnerabilities in components such as the IPnet TCP/IP stack, RPC subsystem, and WDB debugging infrastructure.
Commonly referenced issues include:
| Vulnerability | Component / Impact |
|---|---|
| URGENT/11 | IPnet TCP/IP stack vulnerabilities, including remote code execution and denial of service in affected configurations |
| CVE-2019-12255 | TCP Urgent Pointer processing vulnerability that can cause task or service crashes |
| CVE-2019-12260 | Improper handling of malformed TCP Authentication Option data |
| CVE-2019-9865 | RPC-related integer-overflow and memory-corruption issue |
| CVE-2010-2965 | WDB target-agent debugging service vulnerability |
The exact exposure depends on the VxWorks version, patches, enabled components, network configuration, and target architecture.
🔎 Fingerprinting Legacy IPnet Deployments #
The URGENT/11 vulnerability family affected the legacy Wind River IPnet networking stack.
Defenders can use authorized fingerprinting tools to determine whether a test target exhibits characteristics associated with an affected IPnet implementation.
For an isolated lab target, a detector may be invoked in a form such as:
python3 urgent11-detector.py -t 192.168.111.200A positive fingerprint does not by itself prove exploitability of every URGENT/11 vulnerability. It should instead trigger additional validation of:
- Exact VxWorks version
- Installed security patches
- Enabled networking components
- Target architecture
- Exposed services
- Vendor-specific modifications
This distinction is important when assessing legacy embedded systems.
⚠️ CVE-2019-12255 and TCP Urgent Pointer Handling #
CVE-2019-12255 is associated with malformed TCP Urgent Pointer processing in affected VxWorks versions.
In vulnerable configurations, specially crafted network traffic can cause a denial-of-service condition by disrupting affected tasks or services.
The reported affected range includes:
6.5 <= VxWorks < 6.9.4Defensive validation #
For production systems, avoid directly triggering a denial-of-service condition merely to prove vulnerability.
A safer assessment workflow is:
- Identify the exact VxWorks release.
- Determine whether the affected networking stack is present.
- Check vendor security advisories and patch status.
- Verify whether vulnerable services are reachable.
- Reproduce the condition only in an isolated, disposable laboratory environment.
This provides useful security evidence without unnecessarily interrupting operational equipment.
🔐 CVE-2010-2965 and the WDB Debug Service #
The WDB target agent provides debugging functionality between the development host and VxWorks target.
Older VxWorks configurations exposed WDB over UDP port 17185 and could lack strong authentication controls.
That creates a significant security concern because a remotely accessible debugging interface has substantially more privilege than a normal application service.
Depending on the affected implementation, an attacker may be able to interact with system memory or invoke privileged functionality.
Why WDB exposure matters #
Debugging interfaces should never be treated like ordinary network services.
For production systems:
- Disable WDB when it is not required.
- Restrict access with network segmentation and firewall rules.
- Do not expose debugging interfaces to untrusted networks.
- Monitor UDP port 17185 where appropriate.
- Separate development targets from operational systems.
A legacy RTOS can remain secure only when unnecessary management and debugging surfaces are controlled.
🧪 Building a Safe VxWorks Security Lab #
The VMware configuration described above is useful not only for learning VxWorks internals but also for understanding legacy embedded-system security.
A practical isolated lab can separate the environment into:
+---------------------------+
|       Developer Host      |
|                           |
| WorkBench + Build Tools   |
| FTP Server                |
+-------------+-------------+
              |
              | Isolated Network
              |
+-------------v-------------+
|       VxWorks Target      |
|                           |
| VMware + VxWorks 6.8      |
| BootROM + Kernel Image    |
+---------------------------+
The key security principle is isolation.
Use a private virtual network, disposable snapshots, non-production credentials, and test-only target images. Vulnerability verification should never depend on crashing or modifying a real operational control system.
📌 What the VxWorks 6.8 Workflow Teaches #
The VxWorks 6.8 development model illustrates a classic embedded cross-development architecture:
Source Code
     |
     v
WorkBench / Host Toolchain
     |
     +--------------------+
     |                    |
     v                    v
    BSP              VxWorks Image
     |                    |
     v                    v
 bootROM             vxWorks Kernel
     |                    |
     +---------+----------+
               |
               v
        VMware / Hardware
               |
               v
        VxWorks Runtime
The BSP handles target-specific hardware initialization, while the VxWorks image supplies the RTOS and configured system components. In a loadable-image deployment, the boot loader can retrieve the kernel over the network, making iterative development considerably easier.
At the same time, VxWorks 6.8 demonstrates why legacy embedded platforms require careful security management. Old networking stacks, debugging agents, and remotely accessible services can become serious attack surfaces when systems remain deployed for years beyond their original development lifecycle.
For developers and security engineers working with legacy RTOS environments, understanding both sides of the platform—the boot and build architecture and the security implications of legacy services—is essential.